Showing posts with label dessert. Show all posts

Wednesday, November 17, 2010

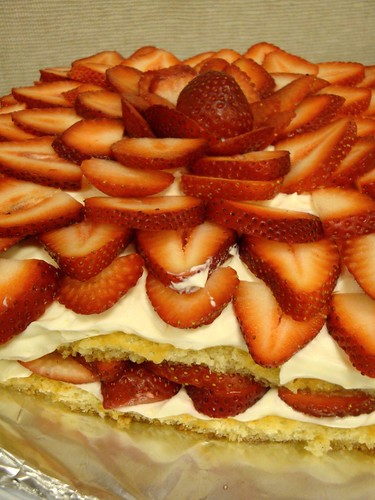
Fresh Berry Tiramisu

A few months ago, one of my coworker's announced that she married her long-time boyfriend in a private wedding ceremony. We were very excited for her and wanted to host a small celebration in her honor. I started searching for the perfect recipe to help her celebrate his new beginning and came across a berry tiramisu. I don't think I've ever had tiramisu-- it's not really my thing and halfway through this experiment, I came to the realization it’s really hard to make a recipe that you don’t know what the end product is going to taste like (probably obvious, but I guess I like to state the obvious).

The biggest obstacle for me was creating the sponge cake portion. I had a hard time incorporating the flour mixture into the egg mixture. The flour gobbed up (best description I can think of) and created pockets of flour surrounded by the wet-egg mixture. I was trying to be careful not to deflate the batter by mixing too hard so after a while I ended up baking the cake. The flour chunks softened when I added the syrup after it baked but I realized I need to learn how to fold flour into a wet mixture better. It was stressful!

Anyway, after that adventure, I assembled the cake and I have to say, this recipe is pretty incredible. My coworkers absolutely loved it! I am dreaming of strawberry season so I can make it again.


Fresh Berry Tiramisu
Adapted from King Arthur Flour

Sponge cake

1 cup unbleached all-purpose flour
1 teaspoon baking powder
1/2 teaspoons salt
6 large eggs
1 cup sugar
1/2 teaspoon almond extract

Syrup
Zest of 2 lemons, peeled in strips with a peeler
Juice of 2 lemons (1/3 to 1/2 cup lemon juice)
2 whole cloves
3/4 cup sugar
3/4 cup water
3 tablespoons Grand Marnier or orange juice

Filling
1 pound mascarpone cheese
2 tablespoons orange zest
1 cup (8 ounces) whipping cream
1/2 cup confectioners’ sugar

2 quarts berries: raspberries, blueberries, strawberries or any combination you like
Preheat the oven to 350°F and lightly grease, or line with parchment, a 13 x 18-inch half-sheet pan or two 9-inch square pans (this would lead to a thicker cake).

To make the cake:
Whisk together the flour, baking powder and salt, set aside.

Combine the eggs, sugar and almond extract in a large mixing bowl. Beat with an electric mixer at high speed until thick and lemon-colored, about 5 minutes.

Sprinkle one third of the dry ingredients over the egg mixture, and fold them in with a whisk, taking care not to deflate the batter. Repeat twice more with the remaining dry ingredients, then pour the batter into the prepared pan(s). If you’re using two 9-inch square pans, divide the batter evenly between them.

Bake the cake in the preheated oven for 20 minutes, or until the top springs back when lightly touched with a finger.

Remove the cake from the oven and run a knife around the edge of the pan while still warm (as the cake baked, it pulled away from the edges of the pan, so I didn't need to do this). Place the cake on a rack to cool completely before taking it out of the pan.

To make the syrup:
Combine all the syrup ingredients and bring the mixture to a simmer, stirring occasionally until the sugar dissolves. Once the mixture is clear, remove the syrup from the heat, strain it, and allow it to cool to room temperature.

To make the filling:
Place the mascarpone in a mixing bowl, and wisk in the orange zest. Add the whipping cream a third at a time, stirring between additions until the mixture is smooth. Stir in the confectioner’s sugar. Beat for at least a minute or more as needed until the filling is light and fluffy.

To assemble:
Flip the cooled cake out of its baking pan or pans onto a piece of parchment paper. If you’ve baked on parchment, peel the parchment off the back. Pull the paper straight back, keeping it parallel to the surface of the cake; this will discourage any bits of cake from coming off with the paper.

Slice the cake in half down the middle, to make two roughly 9 by 13-inch rectangles. Trim the rectangles to make 9-inch squares, and set aside the excess to use for another purpose (trifle perhaps?). If you’ve used two 9-inch square pans, flip the cooled cakes out of their pans and peel the parchment off the bottoms.

Place one of the 9-inch squares in the bottom of a lightly greased 9-inch square pan (or a cake stand, plate, etc- basically, you can't really move the sponge cake after you soak it so make sure this is your final destination). Using a pastry brush, generously soak the cake with 1/2 cup of citrus syrup. You’ll need to dab the syrup on, let it soak in for a few minutes, then repeat the process.

After the cake has been soaked, spread half the mascarpone filling over the cake. Next, arrange a single layer of berries over the filling then place the second square of cake on top. Soak this layer of cake with syrup as you did before. Spread the remaining filling over the cake layer, then place the rest of the berries in an attractive design on the top (I started at the perimeter with sliced berries and moved towards the center). Refrigerate the cake for at least an hour before serving.

Yield: one 9-inch cake, 16 2-inch squares.
DSC05046

Wednesday, August 4, 2010

Mint Milano Tart

Recently, I was thinking about cookie crusts and realized most cookie crusts are made from oreos or graham crackers. I started wondering about what other cookies I could make crusts out of and decided I wanted to try using mint milanos.

I would have to say this dessert was quite decadent... I've never cut small pieces of cake, tart, pie etc before but I definitely did this time. The mint milanos gave the tart a light mint flavoring. If you wanted a stronger mint flavoring, I'd add mint extract or mint leaves in to the tart.

I'm looking forward to making this again! Keep your eyes out for a variety of cookie tarts & pies in the future :)

Mint Milano Tart
my creation!

1 package mint milano cookies (I ate 2, gave 1 to my husband- so I used 13 total)
3 tbsp butter, melted
1 cup whipping cream
12 oz chocolate, cut into pieces (I used 4 oz bittersweet & 8 oz semi-sweet)

In a food processor, pulse the cookies until fine chopped then add the melted butter and pulse until combined.

Add the cookie mixture to a tart pan and spread the mixture evenly across the bottom and up the sides (mine didn't reach the top). I refrigerated the crust for about 30 minutes, then placed in an 350 degree oven for 5-7 minutes and then returned it to the fridge. I don't believe the oven was necessary but it was on so I threw it in there.

In a saucepan, bring the cream to a boil and then pour over the chocolate. Let sit for a few minutes and then stir until combined.

Pour chocolate mixture into the prepared crust and return to the refrigerator to set for at least an hour - two hours.

DSC04614

Wednesday, July 28, 2010

Summer Shortcake

I've recently discovered a love of shortcakes, whipped cream and berries... I tend to gravitate towards chocolate recipes when making desserts but I do have a strong love for fruit desserts as well... and I was never a fan of whipped cream until recently-- I only eat it paired with the right dessert.

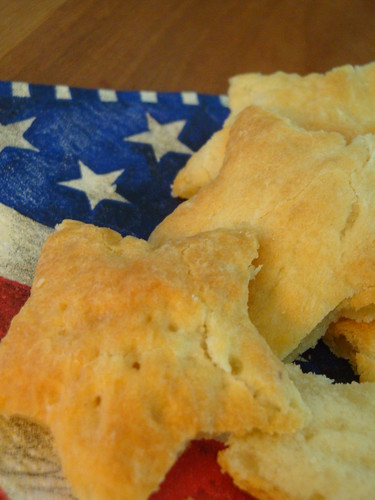
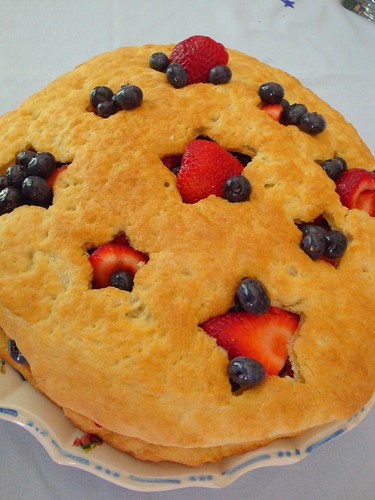
This recipe is easy to make and pull together for a summer bbq or gathering. It's light and tastes delicious... and cute to boot! It was a perfect dessert for the Fourth of July but could make an appearance throughout the summer as well.


Summer Shortcake
adapted from Martha Stewart

Serves 12 to 15

2 1/2 cups all-purpose flour, plus more for dusting
1/4 cup granulated sugar
1 teaspoon baking powder
1 teaspoon baking soda
1 stick (8 tablespoons) cold unsalted butter, cut into 1/2-inch pieces
8 ounces cold cream cheese, cut into 2-inch pieces
3/4 cup buttermilk, plus more for brushing
Raw sugar or fine sanding sugar, for sprinkling
2 pints blueberries
2 pints strawberries, hulled (small berries left whole, large berries halved lengthwise)
3 tablespoons granulated sugar
2 cups (1 pint) heavy cream

Directions

1. Make the biscuits: In a food processor, pulse flour, granulated sugar, baking powder, baking soda, and salt until combined. Add butter, and pulse until largest pieces are the size of peas. Add cream cheese, and pulse again until largest pieces are the size of peas. Add buttermilk, and pulse until dough comes together. Transfer to a bowl, and gently knead into a ball. Cover with plastic wrap, and let rest in the refrigerator at least 1 hour (or overnight).

2. Preheat oven to 450 degrees. Divide dough in half. Working with one portion at a time on a lightly floured work surface, pat into a disk, then roll into a 10-inch round. Transfer to baking sheets lined with parchment paper.

3. Brush biscuits with buttermilk. Generously sprinkle raw or sanding sugar over tops and sides. Brush off sugar from parchment. Bake until dough has risen slightly and is golden brown, 12 to 15 minutes (if bottoms brown too quickly, reduce temperature to 400 degrees). Leave biscuits on sheets. Using a 2 1/2-inch star cutter, cut out (but do not remove) 7 stars from one biscuit while it is still warm. Let cool.

4. Using a paring knife, carefully remove star shapes. Reserve for snacking or another use. (Biscuits can be made up to 8 hours ahead; store on wire racks, and cover loosely with plastic wrap.)

5. Make the filling: Combine blueberries, strawberries, and 2 tablespoons sugar, and let macerate until juicy, 10 minutes.

6. Just before serving, beat cream to medium peaks with remaining tablespoon sugar and the vanilla.

7. Assemble the cake: Place uncut biscuit on a large plate. Spoon half the berries and their juices on top of biscuit, then spread the whipped cream over berries. Top with all but about 1/2 cup berries. (Make sure surface is even; it will support the top biscuit and prevent it from breaking.) Carefully place cutout biscuit on top. Fill star cutouts with reserved berries. Serve immediately, or refrigerate, uncovered, up to 3 hours.


DSC04392

DSC04389

Friday, July 16, 2010

S'More Whoopie Pies

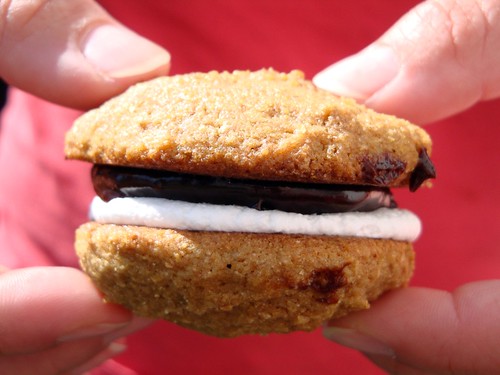
I've had s'mores on my mind for a while now-- it's the perfect combination-- whoever first thought to combine graham crackers, chocolate and marshmallows should be made a saint. I'm a funny girl- I don't love marshmallows... I only eat them in s'mores. I've been thinking about what kinds of desserts can be combined to create a s'more... and a whoopie pie seemed logical. There aren't a lot of recipes out there for it but was happy with the ones I came across. I ended up making these for a work party a few weeks ago and they were a huge hit! I think next time I'll have to double the batch! I now own graham flour so I foresee a lot of s'mores in my future :)


S'More Whoopie Pies
adapted from K Bakes

Graham Cookie
1 1/2 cup graham flour (I used whole wheat graham flour- could use regular whole wheat flour as well)
3/4 cup all purpose flour
1 1/2 tsp baking powder
1/2 tsp salt
4 tbsp unsalted butter, softened
4 tbsp vegetable shortening
1 c packed dark brown sugar
2 large eggs
1/2 cup buttermilk
2 tbsp milk
1 tsp baking soda
1 tsp white vinegar
1 tsp vanilla extract

Directions:

Place rack in the center of the oven and prehead to 375. Line a baking sheet with parchment or silpat mat.

In a medium bowl, stir together both flours, baking powder, and salt.

In a stand mixer fitted with a paddle attachment, beat butter, shortening, and brown sugar until light and cream, about 3 minutes. Add eggs and buttermilk and beat until combined.

In another bowl, combine milk, baking soda, and vinegar. Add this mixture slowly to the batter along with the flour mixture and beat on low speed until completely combined.

Drop about 1 tablespoon of batter onto baking sheet, repeat spacing them at least 2 inches apart- you can use a pastry bag, ziplock bag with tip cut off or a spoon.

Bake for about 10 min until the cakes begin to brown.

Remove from the oven and let the cakes cool on the sheet for 3-5 min before transferring them to a rack to cool completely.

Spread with marshmallow cream and chocolate ganache-- the ganache didn't set in time so I ended up piping/ scooping the ganache onto one side of the cookie and freezing it for 5 minutes. Then placed the other cookie (with the marshmallow cream) on top of it and refrigerated it until ready to serve.

The chocolate softened pretty quickly so I wouldn't recommend letting them sit out-- keep refrigerated until ready to serve.

Makes about 40 two-inch cakes, about 20 assembled whoopie pies.

Marshmallow Cream
1 1/2 c marshmallow creme
1 1/4 c vegetable shortening
1 c confectioner's sugar
1 tbsp vanilla extract

In the work bowl of a stand mixer fitter with the paddle beat together marshmallow fluff and shortening, starting on low and increasing to medium speed until the mixture is smooth and fluffy, about 3 min.

Reduce mixer speed to low, add confectioner's sugar and vanilla, and beat until incorporated. Increase mixture speed to medium and beat until fluffy.

Chocolate Ganache
1 small bag (12oz) semisweet or bittersweet chocolate chips
3/4 cup heavy whipping cream

Place your chocolate in a large, heat proof bowl.

Heat the cream in a saucepan over medium heat just until in bubbles.

Pour the heated cream over the chocolate in the bowl and let it sit for about 10 minutes, until the chocolate is melted. Stir with a whisk until smooth.

Allow the mixture to rest until firm enough to spread, about 2 hours. Or you can refrigerate it for about 30 min until it is firm enough to spread, shirting every 10 min.
 
DSC04270

Friday, July 9, 2010

Building a Nest: Samoa Cookie Flavored Bird Nest Cupcakes

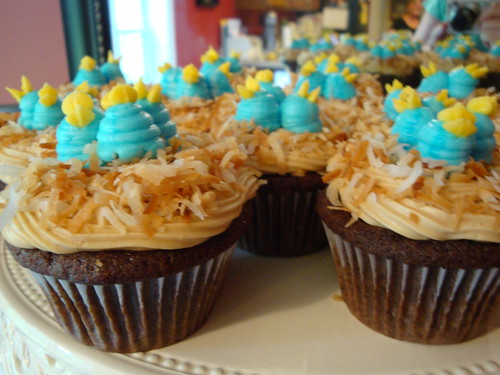
I found the idea for these cupcakes on Martha Stewart's site and they worked perfectly for the theme I was going for for the shower. The hardest part came wtih deciding the cupcake/ frosting combination... i needed to pair with coconut and fit in with bird nest concept-- I searched high and low, and had several ideas... but I wasn't set on any of them. At lunch, the last day of work before the shower, one of my coworkers suggested samoa cookie as a flavor idea... and I literally hopped up and ran to google it. I came across this recipe and it just seemed perfect.

It turned out great! The only problem I had was halving the recipe-- it believe I added the whole amount of cocoa for half the recipe-- but it was pretty good! I'd have to make it again to double check that. The frosting is A.M.A.Z.I.N.G.... it was pretty easy to make and tasted perfect. I'm very happy with how these came out... minus the birds. I think they could have been better... plus I forgot to add their eyes! Ooops!


Samoa Bird Nest Cupcakes
adapted from Life in a Peanut Shell (adapted from Ghirardelli Grand Fudge Cake)

Made 24 regular sized cupcakes (I made half the recipe)

Ingredients:
3/4 cup Unsweetened Cocoa (I tried Ghirardelli cocoa for this recipe)
2 cups all-purpose flour
1 3/4 cups sugar
1 teaspoon baking powder
1 teaspoon baking soda
1/2 teaspoon salt
1 cup butter, softened
1 1/3 cups milk
2 large eggs
2 teaspoons vanilla


Preheat oven to 350ºF. Line 2 regular muffin tins with liners.

In a medium bowl, combine flour, cocoa, baking powder, baking soda, and salt, and set aside.

In a large bowl, cream butter and sugar on medium-high speed until light and fluffy, about 4 minutes. Reduce speed to low, and add vanilla and eggs one at a time, scraping bowl after each addition. Alternately add flour mixture and milk (starting and ending with the flour mixture), while mixing on low speed. Continue to mix until smooth. Scoop into muffin tins.

Bake for about 15-18 minutes.


Caramel Buttercream

2 1/2 cups light brown sugar
1/2 cup butter
1 cup heavy whipping cream, (put 2-3 tbsp aside)
1/2 tsp baking soda
3-4 cups powdered sugar, sifted

In a medium, heavy saucepan, bring the sugar and cream to a rolling boil. Boil one minute.

Add soda, and boil one more minute. Remove from heat.

Add butter, but do not stir yet. Let the mixture cool in the fridge for 1-2 hours. Do not stir until mixture is completely cooled.
Pour mixture into a stand mixer and, using the paddle attachment, beat well. Gradually add powdered sugar alternately with 2-3 tbsp of heavy cream. Beat until desire consistency.


To Decorate:

Toast sweetened coconut until golden in color. Let cool.

Using a 1M tip, frost the cupcakes. Then sprinkle coconut on top of the frosting (most around the perimeter). I used buttercream for the birds-- divide into 2 bowls and color blue & yellow (or whatever color you want). Using a round tip, pipe 3 mounds of blue icing in the middle of the cupcakes. Then use a leaf tip and pipe the beak. Melt some chocolate and use a toothpick and dot the eyes on each bird (use your imagination here).


DSC04002DSC03984

Monday, June 21, 2010

A Maine Lobster Suppah: Blackberry Cobbler

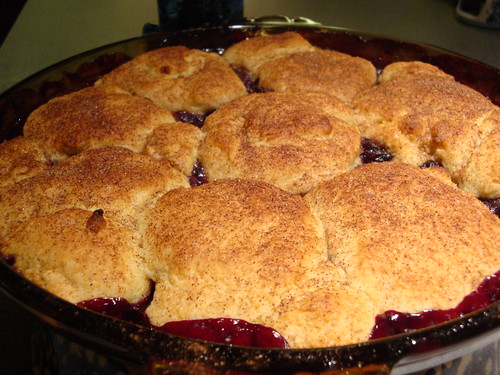
One word: Love... I absolutely loved this dessert. The tartness of the berries paired perfectly with the sweetness of the topping. To be honest, I don't think I've ever had a cobbler... so I wasn't really sure what to expect but I love most fruit pies so I knew it would probably be delicious. This dish is really easy to pull together beforehand and bake while eating dinner and I'd definitely make it again. The original recipe called for blueberries but blackberries were cheaper and in season-- and honestly, made this dish devine.

Blackberry Cobbler
adapted from Cooks Illustrated (March 22, 2007)

filling
30 ounces blackberries, rinsed and picked over
1/4- 1/3 cup sugar (depending on tartness of the berries)
2 tbsp fresh lemon juice
1 tbsp cornstarch
1/2 tsp ground cinnamon

topping
1 cup unbleached all-purpose flour
3 tbsp yellow cornmeal
1/4 cup sugar plus 2 tsp
1 tsp baking powder
1/4 tsp baking soda
1/4 tsp salt
1/3 cup buttermilk
3 tbsp unsalted butter, melted
1/2 tsp vanilla extract
1/8 tsp ground cinnamon

1. Adjust an oven rack to the middle position and heat the oven to 400 degrees. Toss the fruit filling ingredients together in a 9-inch deep-dish pie plate. Place the pie plate on a rimmed baking sheet and bake until the fruit releases its liquid and is hot and bubbling around the edges, 20 to 30 minutes.

2. Meanwhile, whisk the flour, cornmeal, 1/4 cup of the sugar, the baking powder, baking soda, and salt together in a large bowl; set aside. In a separate bowl, whisk the buttermilk, butter, and vanilla together; set aside. In a third small bowl, mix the remaining 2 teaspoons sugar with the cinnamon; set aside.

3. When the filling is ready, stir the buttermilk mixture into the flour mixture with a rubber spatula until just combined and no pockets of flour remain. Remove the cobbler filling from the oven and stir. Pinch off 8 equal pieces of the biscuit dough and arrange them on top of the hot filling, spaced 1/2 inch apart. Sprinkle the tops of the biscuits with the cinnamon sugar.
4. Continue to bake the cobbler until the biscuits are golden brown on top and cooked through and the filling is again hot and bubbling, 15 to 20 minutes. Cool the cobbler on a wire rack for 15 minutes before serving.


DSC03807

DSC03795

Friday, May 28, 2010

Amazing Oatmeal Chocolate Bars

These cookie bars are just incredible. The first time I had them, years ago, it was just incredible. I'm pretty sure I had them at someone's house and ran home to search for the recipe. I found one on Hershey's site and made it the first chance I got... and somewhere, over time, I forgot about these bars. Last summer, I had them again and the memories of my love for them flooded back.

I pulled the recipe up again and was surprised that it had cocoa as the main ingredient for the chocolate filling.... I decided to use real chocolate instead and holy amazingness. It's just heaven in every bite! I can't remember exactly how much bittersweet chocolate I added but I just kept adding it in until it screamed of chocolate. One can never get too much chocolate, right?!?


Chocolate Filled Oatmeal Walnut Bars
adapted from Hershey

Oatmeal Part:
1 cup (2 sticks) butter or margarine, softened
2 cups packed light brown sugar
2 eggs
1 teaspoon vanilla extract
1/2 teaspoon powdered instant coffee(optional)
3 cups quick-cooking rolled oats
2-1/2 cups all-purpose flour
1 teaspoon baking soda
1/2 teaspoon salt
1-1/2 cups chopped walnuts, divided

Chocolate filling:
1/2 cup (1 stick) butter or margarine
12 ounces semi-sweet baking chocolate, chopped
4-6 ounces bittersweet baking chocolate, chopped
1 can (14 oz.) sweetened condensed milk (not evaporated milk)
1-1/2 teaspoons vanilla extract

Directions:

1. Heat oven to 350°F.

2. Beat butter and brown sugar in large bowl until well blended. Add eggs, vanilla and instant coffee, if desired; beat until fluffy. Stir together oats, flour, baking soda, salt and 1 cup walnuts; gradually stir into butter mixture with spoon. (Dough will be thick.) Set aside 2 cups dough.

3. Melt butter in medium saucepan over low heat. Stir in chocolate. Add sweetened condensed milk; cook, stirring constantly, until smooth and thick. Remove from heat. Stir in vanilla.

4. Press remaining dough evenly onto bottom of ungreased 15-1/2x10-1/2x1-inch jelly-roll pan (I didn't have a jelly roll pan so I used a 9x13 pan). Spread chocolate filling evenly over dough. Crumble reserved dough evenly over filling. Sprinkle with remaining 1/2 cup walnuts.

5. Bake 25 minutes or until top is golden brown (chocolate will be soft). Cool completely in pan on wire rack; cut into bars. About 4 dozen bars.

DSC03655

Stay tuned next week for the cool sugar cookie stars in this picture!
DSC03625

Friday, May 21, 2010

Jam Cupcakes

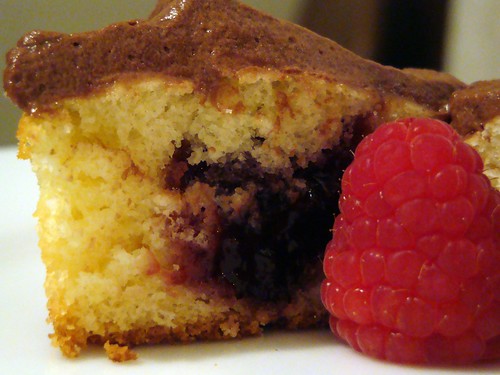
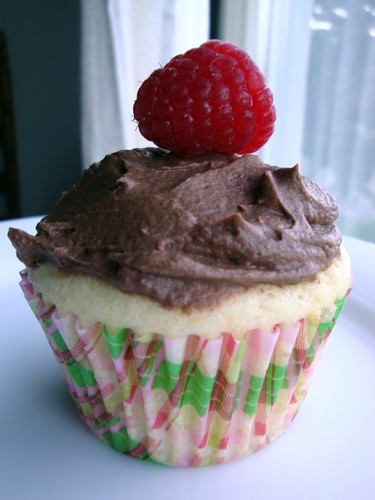
I love the concept of these cupcakes but I wasn't extremely pleased with the outcome. People did enjoy them but all in all, I wasn't wowed. I think I'd use fresh raspberries and make a filling from scratch instead. I also wish the frosting was richer-- I just want more chocolate! Maybe adding some melted chocolate would intensify it a bit. Overall, it's a pretty easy recipe so it's a simple dessert to whip up in a pinch.

Jam Cupcakes with Chocolate Frosting
adapted from Martha Stewart

1 cup (2 sticks) unsalted butter, room temperature, plus more for pan
1 1/2 cups all-purpose flour (spooned and leveled), plus more for pan
1 1/2 teaspoons baking powder
1 teaspoon salt
3/4 cup granulated sugar
2 large eggs, room temperature
1 1/2 teaspoons pure vanilla extract
1-2 tsp freshly grated lemon zest
1/2 cup plus 2 tablespoons whole milk
1 cup confectioners' sugar
1/4 cup unsweetened cocoa powder
1/4 cup seedless raspberry jam
12 raspberries, for garnish

1.  Preheat oven to 350 degrees. Butter and flour a 12-cup muffin pan, or use liners. Combine flour, baking powder, and 3/4 teaspoon salt. In a large bowl, using an electric mixer, beat granulated sugar and 1/2 cup butter until light and fluffy. Beat in eggs, one at a time. Beat in 1 teaspoon vanilla and lemon zest. With mixer on low, beat in flour mixture in two parts, alternating with 1/2 cup milk.

2. Divide batter among prepared muffin cups. Bake until a toothpick inserted in center of a cupcake comes out clean, about 20 minutes. Let cool in pan 5 minutes. Transfer to a wire rack to cool completely.

3. Meanwhile, whisk together confectioners' sugar, cocoa, and 1/4 teaspoon salt. In a large bowl, using an electric mixer, beat 1/2 cup butter until light and fluffy. With mixer on low, gradually add cocoa mixture, scraping down side of bowl as necessary. Gradually beat in 2 tablespoons milk and 1/2 teaspoon vanilla. Beat frosting until light and fluffy, about 30 seconds.

4. Using a paring knife, cut a 1-inch-deep piece from the top of each cupcake (do not discard). Fill each hole with 1 teaspoon jam and replace cutout pieces. Frost cupcakes and top with raspberries 


DSC03518

DSC03534

Monday, May 17, 2010

Farewell Cupcakes

As part of my job, I run a disease-specific support group. The nurse for this clinic co-facilitates the group with me and has been the backbone of this group. She recently announced that she was leaving to pursue a new job opportunity and we had a goodbye party at our last group meeting.

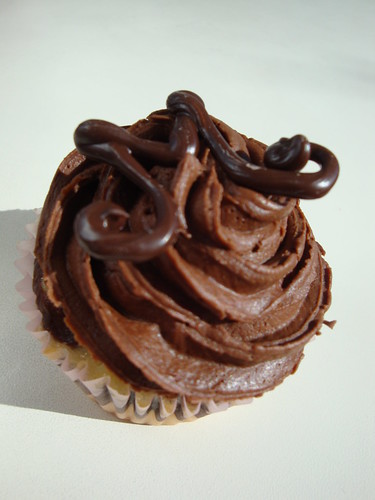
She loves chocolate so I knew I wanted to make something chocolatey... cutting cake in groups is always a hassle and takes too much time so I decided to make cupcakes. I searched high and low for a recipe that I wanted to try and then I was flipping thru Martha Stewart Cupcakes and saw the marble ones. They are so cute! I then found the chocolate cream cheese frosting recipe in the latest issue of Martha Stewart Living.

Overall, the cupcakes were good but the frosting was great! Marble cakes are a bit of a hassle but also kind of fun to make. I'd definitely make these again.


Marble Cupcakes
Martha Stewart

Ingredients
Makes 16 cupcakes

1 3/4 cups cake flour (not self-rising), sifted
2 teaspoons baking powder
1/2 teaspoon salt
1/3 cup milk, room temperature
1/3 cup heavy cream, room temperature
1/2 cup (1 stick) unsalted butter, room temperature
1 cup granulated sugar
3 large eggs, room temperature
1 teaspoon pure vanilla extract
1/3 cup unsweetened Dutch-process cocoa powder
1/4 cup boiling water
Confectioners' sugar, for dusting (optional)


1. Preheat oven to 350 degrees F. Line standard muffin tins with paper liners. Stir together cake flour, baking powder, and salt. Combine milk and cream.

2. Cream butter and granulated sugar until pale and fluffy. Add eggs, one at a time, beating until each is incorporated, scraping down sides of bowl as needed. Beat in vanilla. Add flour mixture in three batches, alternating with two additions of milk mixture, and beating until combined.

3. To make chocolate batter, measure out 1 cup batter, and transfer to another bowl. Combine cocoa and the boiling water in a bowl. Stir into reserved 1 cup batter.

4. Fill prepared cups with alternating spoonfuls of vanilla and chocolate batter, filling each three-quarters full. Run the tip of a paring knife or wooden skewer through batter in a figure-eight motion to make swirls. Bake, rotating tins halfway through, until tops are golden and a cake tester (i.e. toothpick) inserted in centers comes out clean, about 20 minutes. Transfer tins to wire racks to cool completely before removing cupcakes. Cupcakes can be stored overnight at room temperature, or frozen up to 2 months, in airtight containers.

5. To finish dust with confectioners' sugar just before serving.


Chocolate Cream Cheese Frosting
Martha Stewart

2 – 2 ¼ cups confectioners' sugar
1/4 cup unsweetened Dutch-process cocoa powder
pinch of salt
6 ounces cream cheese, room temperature
6 tbsp unsalted butter, softened
9 ounces bittersweet chocolate, melted
¾ cup sour cream

Directions

Sift sugar, cocoa powder, and salt into a large bowl. Put cream cheese and butter into the bowl of an electric mixer fitted with the paddle attachment; mix on medium-high speed until pale and fluffy, about 4 minutes. Reduce speed to low. Gradually add sugar mixture; mix until combined, 1 to 2 minutes. Mix in chocolate and sour cream. Use immediately.

Chocolate Decorations
Chocolate Melts
Canola Oil
Wax Paper
Piping bag

Melt chocolate either in microwave or in double boiler. Mix in a few drops of canola oil to thin chocolate. Assemble piping bag with tip and coupler and add chocolate. Pipe the design on the wax paper and let sit until hardened.


DSC03251

DSC03254

DSC03255

DSC03256

Wednesday, April 14, 2010

Kugel for Passover

During Passover, I was craving dessert and decided I needed kugel. I googled a few recipes and grabbed some ingredients on my way home from work. I have a serious problem of not reading the recipe all the way through before starting. I peeled the apples, soaked the matzoh and then grabbed the carton of eggs from the fridge. My jaw dropped on the floor when I saw it had 8 eggs. Anyway, I played with this recipe a bit and I was pretty happy with the end result. It tasted pretty similar to the noodle kugel my family makes-- no where as creamy though.

Anyway, I enjoyed it and it was a nice change from the kugel that I know and love. I'll have to blog about that one sometime soon!

Apple-Matzoh Kugel
adapted from Epicurious: Abigail Kirsch

4 large apples, Granny Smith or any tart apple, cored and cut into medium diced
1/2 cup light brown sugar
1/4 cup orange juice
6 plain matzohs (I used egg matzohs)
8 eggs (5 egg whites, 3 whole eggs)
1 teaspoon salt
1 teaspoon ground cinnamon
1 1/2 cups sugar 1/2 cup sugar (I cut the sugar down significantly)
1/2 cup (8 tablespoons) butter or margarine, melted 6 tbsp butter, melted (probably could use less or eliminate)
1 cup golden raisins
1 cup dried apricots, medium, chopped
4 tablespoons butter or margarine, cut into small pieces, for casserole topping (I used less)
cinnamon & sugar mixture
chopped nuts (walnuts possibly)- I didn't add any but I definitely think it would be a great addition


1. Preheat the oven to 350°F.

2. Toss the apples with the brown sugar and orange juice, set aside in a medium bowl.

3. Break the matzoh into 2- to 3-inch pieces and soak in 1 cup of warm water until soft but not mushy. Set aside.

4. While the matzoh soaks, beat the eggs with a wire whisk in a large bowl until blended. Add the salt, sugar, cinnamon and melted butter.

5. Squeeze the liquid from the softened matzoh and add the matzoh to the egg mixture with the apples. Stir the kugel well and pour into a lightly greased 2 1/2-quart casserole dish or a 10x14-inch pan (I used a 9x13 pan). Sprinkle cinnamon & sugar mixture evenly on top of the mixture. Dot the top of the kugel with the 4 tablespoons of butter.

6. Bake the kugel for 1 hour. Cover the top with foil if the top begins to become too brown early in the baking. Remove the kugel from the oven and cool to room temperature.

DSC03117

Wednesday, February 24, 2010

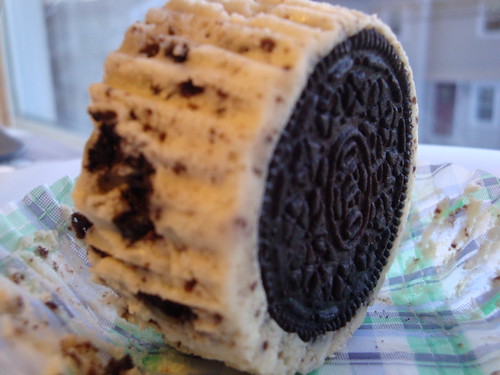
There's an oreo at the bottom!

 I've tried making cheesecake once in my life and it was probably my biggest kitchen disaster. I pride myself on being able to at least choose successful and yummy recipes but the one I tried was absolutely disgusting. I think I should have taken a clue since I found it in a Renal Transplant newsletter. It ended up in the trash.

Danimal and I went skiing a few weekends ago with a bunch of work people and friends. I didn't want to go empty handed so I made a bunch of desserts... these oreo cheesecake cupcakes and the coconut cupcakes. This recipe is great because it's easy to pull together and can be cut in half. I highly suggest trying this recipe! I used light cream cheese and sour cream and can only imagine how rich and creamy it is with regular cream cheese. They are pretty amazing!

Oreo Cheesecake Cupcakes
as seen on Cate's World Kitchen which was adapted from 52 Cupcakes, originally from Martha Stewart’s Cupcakes

22 Oreos, 16 left whole, and 6 coarsely chopped
2 8-oz packages cream cheese, at room temperature (or Neufchatel) (I used Philly LIGHT cream cheese)
1/2 cup sugar
1/2 tsp vanilla extract
2 large eggs, room temperature, lightly beaten
1/2 cup sour cream (I used light sour cream)
Pinch of salt

Preheat oven to 275 F.

Line 12 standard muffin tins and 4 ramekins with paper liners.

Place 1 whole Oreo in the bottom of each lined cup.

Beat the cream cheese in the bowl of a stand mixer on medium. Gradually beat in the sugar and vanilla. Pour in the beaten eggs, a little at a time, scraping down the sides of the bowl after each addition. Beat in the sour cream and salt. Stir in chopped cookies by hand.

Pour the batter into the prepared tins, filling each almost to the top.

Bake, rotating pan halfway through, until filling is set, 22-25 minutes.

Cool in the pans for about 15 minutes, on a wire rack, then transfer to a plate in the refrigerator for at least 4 hours.

dsc02818

dsc02825

Monday, February 22, 2010

Cookie Dough Heaven

I've seen cookie dough truffles featured in blogs and on websites many a time before. A few months ago, my sister made them and I heard how incredible they were. I had already made oreo truffles and cake balls and found dipping them in chocolate to be time consuming and a pain. I wasn't really sure if I wanted to take that on again.

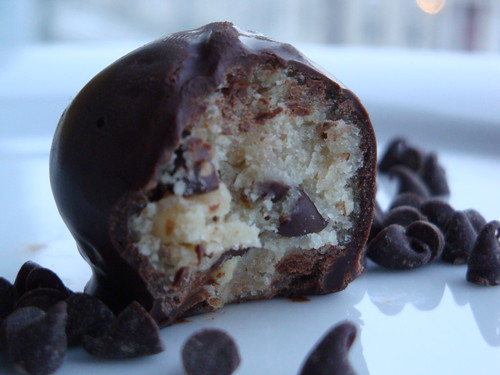
Well, people kept blogging about them and I kept thinking about them and I knew I needed to try it myself. What can be better than cookie dough and chocolate?! I have a bunch of bags of chocolate candy coating but I don't really like the taste of them. I decide to try it with chocolate chips and they worked pretty well- I did that to save time. Next time I'm using real chocolate. Adding the oil helps thin the chocolate and works to coat the truffles. The dough is less sticky than oreo truffles and cake balls and dipping them took less time!

These are pretty yummy and I am totally making them again!


Cookie Dough Truffles
Paula Dean

1/2 cup butter, softened
3/4 cup firmly packed brown sugar
1 teaspoon vanilla extract
2 cups all-purpose flour
1 (14-ounce) can sweetened condensed milk
1/2 cup semisweet mini chocolate morsels
1 cup finely chopped pecans
1 1/2 pounds chocolate bark candy coating, melted
1 1/2 cups semi-sweet chocolate chips (or another good chocolate, chopped)- melted
2 teaspons canola oil


In a large bowl cream butter and brown sugar with an electric mixer at medium speed until creamy. Add vanilla. Gradually beat in flour and add milk. Add chocolate morsels and pecans, mixing well. Shape into 1-inch balls. Place on waxed paper; chill 2 hours.

Melt chocolate in a double boiler (I used the base of a double boiler and a pyrex bowl- boil water and reduce to a simmer. Place bowl on the pot and add chocolate. Be careful not to let water touch the chocolate. Add oil to thin the chocolate and mix to combine). Using 2 forks, dip cookie balls into chocolate to cover. Place on waxed paper and chill to set. Store in the refrigerator for at least 1 hour.


dsc02817

Monday, February 15, 2010

Cuteness in cookie form

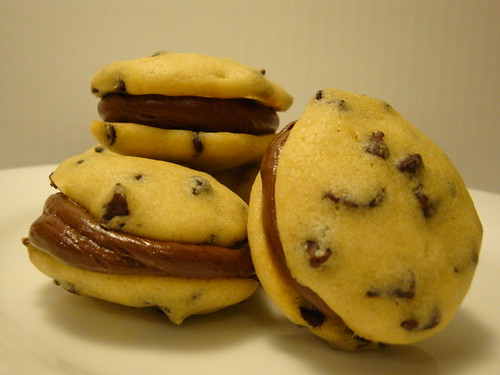
Get ready for cuteness... these things are absolutely adorable. These puppies are mini chocolate chip whoopie pies and were less than two inches in diameter. They are pretty easy to make and are a hit. They seem easy enough to make with a group of kids. I don't love regular whoopie pies- I find them too sweet but these had the perfect amount of chocolate for me! Enjoy :)


Mini Chocolate Chip Whoopie Pies
Nestle Tollhouse

Cookies:
  • 1 1/4 cups all-purpose flour
  • 1/4 teaspoon baking soda
  • 1/4 teaspoon salt
  • 1/4 cup (1/2 stick) butter, softened
  • 1/4 cup packed brown sugar
  • 1/2 cup milk
  • 1 large egg
  • 1/2 teaspoon vanilla extract
  • 1/2 cup Semi-Sweet Chocolate Mini Morsels

Preheat oven to 350°F. Line two baking sheets with parchment paper or lightly grease.

Combine flour, baking soda and salt in small bowl. Beat butter and sugar in medium mixer bowl on medium speed until light and fluffy. Beat in milk, egg and vanilla extract (mixture will be thin.) Beat in flour mixture on low speed until smooth. Stir in morsels. Drop by heaping measuring teaspoonfuls onto prepared baking sheets. (A total of 36 cookies are needed for the recipe.)

 Bake for 12 to 14 minutes until springy to the touch. Cool completely on baking sheets.


Filling
  • 1 cup (6 oz.) Semi-Sweet Chocolate Mini Morsels
  • 1 cup marshmallow crème (Fluff)
  • 2 tablespoons butter, softened  
Microwave morsels in uncovered, medium microwave-safe mixer bowl on HIGH (100%) power for 30 seconds; stir. The morsels may retain some of their original shape. If necessary, microwave at additional 10- to 15-second intervals, stirring just until morsels are melted.

Add marshmallow crème and butter to melted chocolate. Beat on medium speed until smooth. Transfer filling to resealable plastic bag. Cut hole from corner of bag. Squeeze heaping tablespoon of filling onto flat side of one cookie, top with flat side of second cookie to make a sandwich. Repeat with remaining cookies and filling. Store in covered container in refrigerator.

dsc02747

Thursday, February 11, 2010

Barefoot Bloggers: Coconut Cupcakes

Through the food blogging world, I stumbled upon a group of bloggers who create and blog about Ina Garten's recipes called Barefoot Bloggers. Ina's recipes rarely fail me so I was excited to join this group. People choose recipes and post twice a month. This month, Jaime from Jamie’s Green Kitchen chose Coconut Cupcakes.

I'm not a coconut fan myself but Danimal is... he was really excited to see the bag of shredded coconut in my shopping bag. I wasn't really sure how to change this recipe as I don't like coconut. The only change I made was I made half the amount of frosting as the reviews said that the full amount was too much. The frosting seemed a bit more runny than I expected-- I think I added too much sugar. I don't have a scale at home so I guestimated and I think I really overshot the amount. Oh well!

I haven't had any guinea pigs yet as Danimal is still traveling. We're leaving on a ski trip tonight so they'll be traveling with us. I'll report back later on and let you know how they taste! The recipe says it makes 18-20, I ended up with 24 large cupcakes... I'd make them smaller next time and have even more!

Coconut Cupcakes
Ina Garten

3/4 pound (3 sticks) unsalted butter, room temperature
2 cups sugar
5 extra-large eggs at room temperature
1 1/2 teaspoons pure vanilla extract
1 1/2 teaspoons pure almond extract
3 cups flour
1 teaspoon baking powder
1/2 teaspoon baking soda
1/2 teaspoon kosher salt
1 cup buttermilk
14 ounces sweetened, shredded coconut - divided

For the frosting: (This is the full amount, I made half of this)
1 pound cream cheese at room temperature
3/4 pound (3 sticks) unsalted butter, room temperature
1 teaspoon pure vanilla extract
1/2 teaspoon pure almond extract
1 1/2 pounds confectioners' sugar, sifted

Directions
Preheat the oven to 325 degrees F.
In the bowl of an electric mixer fitted with the paddle attachment, cream the butter and sugar on high speed until light and fluffy, about 5 minutes. With the mixer on low speed, add the eggs, 1 at a time, scraping down the bowl after each addition. Add the vanilla and almond extracts and mix well.

In a separate bowl, sift together the flour, baking powder, baking soda, and salt. In 3 parts, alternately add the dry ingredients and the buttermilk to the batter, beginning and ending with the dry. Mix until just combined. Fold in 7 ounces of coconut.

Line a muffin pan with paper liners. Fill each liner to the top with batter. Bake for 25 to 35 minutes, until the tops are brown and a toothpick comes out clean. Allow to cool in the pan for 15 minutes. Remove to a baking rack and cool completely.

Meanwhile, make the frosting. In the bowl of an electric mixer fitted with the paddle attachment, on low speed, cream together the cream cheese, butter, and vanilla and almond extracts. Add the confectioners' sugar and mix until smooth.

Frost the cupcakes and sprinkle with the remaining coconut.


dsc02804


dsc02803

Friday, February 5, 2010

Go Red for Women

Today is National Wear Red Day to support the fight against heart disease in women. I walked in to our morning staff meeting and found myself facing a sea of ladies in red. It was quite an amazing sight! If you'd like more information about heart disease and "Go Red for Women" visit www.goredforwomen.org/.

Since it's February, the middle of winter, in New England, good fruit is usually scarce. I was at the market the other day and I found the fruit aisle to be well stocked with berries... mostly strawberries... and the price was great! I tend to just cut strawberries up and eat them plain, or sprinkled with a bit of sugar, for dessert but I wanted to try something new. I found a Weight Watchers recipe that just seemed perfect for a cold, February day.

Balsamic Strawberries
Weight Watchers

4 cups strawberries, halved or quartered
2 tbsp unpacked brown sugar
1 tbsp balsamic vinegar
1/8 tsp black pepper, freshly ground
1/2 cup  fat-free vanilla yogurt (I use Stonyfield FF French Vanilla)
1 tbsp mint leaves, optional

1. Combine strawberries, sugar, vinegar and pepper in a bowl. Marinate in the refrigerator for at least 1 hour, stirring at least once.
2. Serve in 4 small glasses or bowls and top each with  2 tablespoons of yogurt and garnish with mint.

1 point per serving


dsc02700

Monday, January 25, 2010

Do you Mandel?

I believe we've established that I like baked goods.. cookies, muffins, cakes... anything with chocolate. Today, I'm sharing Mandel Bread (Mandel Brot) with you. It's a traditional Jewish cookie that looks like biscotti but softer. Some recipes call for the cookie to be baked again after sliced but I like mine soft so no second bake for me. My recipe comes from our dear family friend, Nana Millie.


Mandel Bread
Recipe from Nana Millie

2 1/2 cups flour
1 cup sugar
2 tsp baking powder
1/2 cup vegetable oil

3 eggs, lightly beaten
1 tsp vanilla
1 cup almonds, ground up or chopped into small pieces
1 6oz pkg chocolate chips

In a large bowl, combine the flour, sugar and baking powder. In a small bowl, add the oil, egg and vanilla and whisk to combine. Add wet ingredients to the dry ingredienets and stir by hand until incorporated. Fold in the almonds and chocolate chips. Refrigerate for 1 hour.
Preheat oven to 325°. Line cookie sheet with parchment paper (or nonstick cookie sheet). Divide the batter into three or four pieces depending on how large you want the cookies to be. With well oiled hands, form each piece into a log pressing down so that the dough is about an inch in height. The logs should be placed along the width of the sheet, about 2-3 inches apart.

Bake for 20-30 minutes.

Let logs cool and then slice crosswise 1/2 to 1 inch slices.
Keep in airtight container at room temperature for up to a week-- ours never last the day though!
dsc02590

dsc02591

Wednesday, January 13, 2010

Dessert Addiction

Hi, I'm addicted to desserts. I love chocolate. I love to bake. I love anything to do with chocolate. I saw a recipe on one of the blogs I follow a while ago that I knew I needed to try out. It looked pretty awesome. On New Years Eve, I had to work a normal day and we had plans to go over to a friend's house afterwards to celebrate the New Year. I knew I wouldn't have a lot of time to get a dessert together and this recipe is actually pretty quick to pull together! I used store-bought cookie dough and a brownie mix to save time (but I'm sure it's even more decadent with real homemade cookies & brownies as well!) Enjoy :)

Glenn's Stargazer Pie
Adapted from Dozen Flours

Crust

1 16.5 oz tube of refrigerated chocolate chip cookie dough, softened

Brownie Layer
1 box of Ghiradelli Double Chocolate Brownie mix (or any kind you want)
1/2 cup of cocoa powder, sifted
3 tablespoons of lukewarm water
1/2 cup of vegetable oil
2 eggs, at room temperature
1 teaspoon of vanilla extract (or almond extract- which I don't have)

Cream Cheese Truffle Layer (I doubled this from original recipe)
2 oz bittersweet baking chocolate, chopped
6 oz bittersweet baking chocolate, chopped then melted
8 oz of cream cheese, softened
1 stick of unsalted butter, softened
1 tsp of vanilla extract

Whipped Cream Layer
2 cups of whipping cream
1 teaspoon of vanilla extract
1/4 cup of powdered sugar, sifted
1/3 cup (give or take) of chocolate curls or other garnish, optional

Preheat oven to 350F. Grease a 9 or 9 1/2 inch springform pan with butter.

Spread the cookie dough into the bottom of the pan, making one big even cookie. It will be a little on the thin side, but don't worry, there will be enough. Use a fork to tamp it down. Stick it in the freezer.

Mix the brownie mix and the cocoa powder together in big bowl with a whisk or large fork. Add the water, oil, eggs, and almond extract and mix together until the dry ingredients are absorbed. Be careful not to over mix! The batter should be somewhat lumpy.

Remove the springform pan from the freezer and add the brownie batter right over the top. Bake for 34-38 minutes or until a toothpick inserted into the center of the brownie comes out almost clean.It should be a tad bit less baked than you would a normal brownie.

Remove it from the oven and promptly sprinkle about 2 oz of bittersweet chocolate over the top. Let it sit for a minute or two and once the chocolate chips are soft, evenly spread them over the top of brownie's surface. Let it cool on the counter. I didn't let mine cool enough- the chocolate should set before you add the cream cheese layer.

While the pie is cooling, microwave the remaining 6 oz of chocolate on low power (2 or 3) on 30 second intervals until it is melted, stirring well each time. Set aside. Cream the butter, and cream cheese together for 1 minute. Add the vanilla and stir again. Add the melted chocolate, one big teaspoonful at a time until it's totally incorporated into the cream cheese. Spread the cream cheese mixture over the top of the pie and store it uncovered in the refrigerator for an hour.

About an hour or two before you're ready to serve the pie (or when it's totally cooled off), whisk the whipping cream on high speed until soft peaks form. Add the vanilla and the powdered sugar and mix again until combined. Spread evenly over the top of the pie. Grate chocolate directly over the top, sprinkle chocolate curls, or embellish with chocolate sprinkles. Cover and put it back in the refrigerator for at least 1/2 an hour.

When you're ready to serve, run a thin knife or spatula to around the edge of the pan to free it from the outside ring. Gently remove the ring and serve let it come to room temperature at least a half an hour before serving. You'll know it's ready to serve when you're able to cut it from the center fairly easily.
 
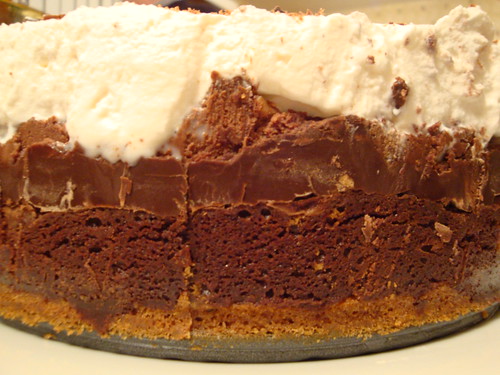
I thought I had photographed a slice of pie but I guess I didn't! 
View from the side
dsc02511
 
Inside view of the pie
dsc02512

Friday, January 8, 2010

Chocolate Pecan Goodness

I saw these puppies when they came across my google reader and wow, they were tempting! And they were pretty darn good! I chose to use semi-sweet and bitter-sweet chocolate instead of the milk chocolate that the recipe called for. I made them for my work holiday party and people really liked them! The recipe takes a little bit of time to prepare but it's definitely worth it!


Chocolate Pecan Diamonds
adapted from Culinary Concoctions by Peabody

Pecan Dough
5 tbsp COLD unsalted butter, cut into 1/2" pieces, plus 1 tbsp melted to coat pan
1 cup all-purpose flour
2/3 cup powdered sugar
2 large egg yolks
1/2 cup unsalted pecans, toasted & coarsely chopped
2 tbsp cold water

Pecan Filling
12 tbsp unsalted butter, cut into 1 tbsp pieces
2 cups dark brown sugar
3/4 cup heavy cream
2/3 cup light corn syrup
4 oz unsweetened baking chocolate, chopped
2 cups unsalted pecans, toasted & coarsely chopped
2 cups semi-sweet chocolate chips
10 ounces bittersweet baking chocolate, coarsely chopped

To make the dough:
Preheat oven to 325F.

Coat a 9 x 13 inch pan with the melted butter.

Sift together the flour and sugar and place in the bowl of a stand mixer fitted the paddle attachment.

Add the cold butter one piece at a time while mixing on low, until mealy in texture, about 2 minutes. Add egg yolks and mix on low until  the dough  forms around the paddle, about 30 seconds.

Add pecans and  mix on low for 30 seconds. I found that it wasn't forming into a dough so I added 2 tbsp of cold water and it came together at this point.

Remove dough from mixer and place in prepared pan. Use hands to flatten the dough evenly to cover the  bottom of the pan. Bake on center rack for 15 minutes. Remove from the oven and set aside.

To make the filling:
Bring butter, brown sugar, cream, and corn syrup to a boil in a large saucepan over medium-high heat, stirring to dissolve the brown sugar. Boil for 3 minutes, until thickened, stirring constantly with a whisk. Remove from heat. Add the unsweetened chocolate and stir until the chocolate has melted.

Stir in the pecans and chocolate chips. Pour filling over the baked dough. Use a spatula to spread evenly.

Bake on center rack for 30 minutes. Rotate the pan 180 degrees halfway through.

Remove from the oven and immediately sprinkle the 10 ounces of bittersweet chocolate over the surface. Place pan back in the oven for 3 minutes. Remove from the oven, and use a spatula to smooth the chocolate. It kinds of makes a marbled effect with the chocolates.

Cool to room temperature for 30 minutes then refrigerate for an hour.

To serve:
Remove from fridge. Turn the pan over on to a clean, dry cutting surface, then turn the contents chocolate side up. Use a sharp knife, cut 1/4 inch off the edges and cut into squares. Serve at room temperature. Keep in refrigerator.

dsc02475

Sunday, January 3, 2010

Neighborly Gifts Part III- The Conclusion

Part I
Part II

The last thing I included in my bag o'cookies for the neighbors was a handful of oreo truffles. For those who have not had these, you should definitely make them at some point! These are kind of like no-bake dessert-- the most time consuming part is dipping them in chocolate. Oreo truffles have been blogged about over and over. For fun ideas, check out http://www.bakerella.com/! I've also made cake balls from bakerella's blog as well and those were equally delicious! Seriously, if you haven't yet, check this woman out!

Oreo Truffles
Bakerella (adapted from Kraft recipe)

1 package oreo cookies (divided… use cookie including the cream center)
1 8oz. package cream cheese (softened)
chocolate bark/ baking chocolate/ chocolate melts

1. Finely crush 7 cookies in a food processor or place them in a ziploc bag and crush into a fine consistency. Reserve for later.

2. Crush remaining cookies and stir in softened cream cheese. Use the back of a large spoon to help mash the two together.

3. Roll the mixture into 1″ balls and place on wax paper covered cookie sheet.

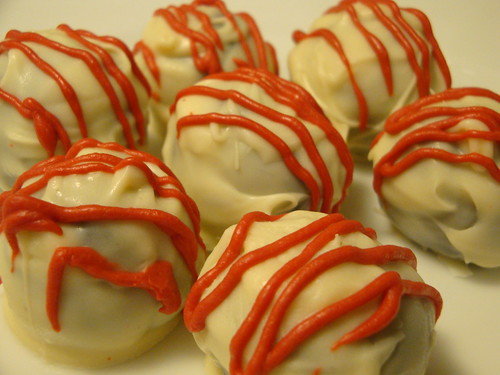
4. Melt chocolate as directed on the package and then dip balls into chocolate, tap off extra and set aside on wax paper covered cookie sheet to dry. You can sprinkle the tops with the 7 crushed cookies for decoration. (I usually eat mine before they make it to this stage.) I dipped mine in white chocolate and then drizzed red chocolate over them (add a few drops of canola oil to thin the chocolate out to drizzle). I also rolled a few in crushed oreo instead of dipping them in chocolate.

5. Once dry, refrigerate and enjoy!

Makes about 36 truffles.

dsc02453
 
dsc02452

Monday, December 14, 2009

Not the "lesser babka"...

To humor my husband, I'm using a Seinfeld reference! He will be so proud.
Happy Hanukkah!!! Our family had our celebration today-- my mom made latkes & applesauce-- both of which are always so good!

dsc02355

I made coffee cake again, this time correctly, with eggs... now that's what it's supposed to look like!

dsc02356

The other night, I was reading my Cooking Light magazine and saw a recipe for chocolate babka... I debated whether or not to make it since I already planned on the coffee cake but I'm glad I did. It was a lot of work and I felt the directions were kind of confusing, but it turned out to be pretty good!


Chocolate Babka
Cooking Light

Dough:
1 teaspoon granulated sugar
1 package dry yeast (about 2 1/4 teaspoons)
3/4 cup warm 1% low-fat milk (105° to 110°) skim milk (it's all I had)
6 tablespoons granulated sugar
1/2 teaspoon vanilla extract
1/4 teaspoon salt
1 large egg yolk, lightly beaten
7.5 ounces all-purpose flour (about 1 2/3 cups), divided
5.85 ounces bread flour (about 1 1/4 cups)
5 tablespoons butter, cut into pieces and softened
Cooking spray

Filling:
1/2 cup granulated sugar
3 tablespoons unsweetened cocoa
1/2 teaspoon ground cinnamon
1/4 teaspoon salt
4 ounces semisweet bittersweet chocolate, finely chopped

Streusel:
2 tablespoons powdered sugar
1 tablespoon all-purpose flour
1 tablespoon butter, softened

 
Preparation

1. Dissolve 1 teaspoon granulated sugar and yeast in warm milk in the bowl of a stand mixer; let stand 5 minutes. Stir in 6 tablespoons granulated sugar, vanilla extract, 1/4 teaspoon salt, and egg yolk. Weigh or lightly spoon flours into dry measuring cups; level with a knife. Add 6 ounces (about 1 1/3 cups) all-purpose flour and bread flour to milk mixture; beat with dough hook attachment at medium speed until well blended (about 2 minutes). Add 5 tablespoons butter, beating until well blended. Scrape dough out onto a floured surface (dough will be very sticky). Knead until smooth and elastic (about 10 minutes); add 1.5 ounces (about 1/3 cup) all-purpose flour, 1 tablespoon at a time, to prevent dough from sticking to hands (dough will be very soft).

I found these directions challenging-- I ended up kneading the dough completely with the mixer but I think it does need to be kneaded by hand more next time.
2. Place dough in a large bowl coated with cooking spray, turning to coat top. Cover and let rise in a warm place (85°), free from drafts, 1 1/2 hours or until doubled in size. (Gently press two fingers into dough. If indentation remains, dough has risen enough.) Punch dough down; cover and let dough rest 5 minutes.

3. Line the bottom of a 9 x 5–inch loaf pan with parchment paper; coat sides of pan with cooking spray.

4. To prepare filling, combine 1/2 cup granulated sugar, cocoa, cinnamon, salt, and chocolate in a medium bowl; set aside.

5. Place dough on a generously floured surface; roll dough out into a 16-inch square. Sprinkle filling over dough, leaving a 1/4-inch border around edges. Roll up dough tightly, jelly-roll fashion; pinch seam and ends to seal. Holding dough by ends, twist dough 4 times as if wringing out a towel. Fit dough into prepared pan. Cover and let rise 45 minutes or until doubled in size.

6. Preheat oven to 350°.

7. To prepare streusel, combine powdered sugar, 1 tablespoon all-purpose flour, and 1 tablespoon softened butter, stirring with a fork until mixture is crumbly; sprinkle streusel evenly over dough. Bake at 350° for 40 minutes or until loaf is browned on bottom and sounds hollow when tapped. Cool bread in pan 10 minutes on a wire rack; remove from pan. Cool bread completely on wire rack before slicing.
I don't have a thermometer so I couldn't tell the temperature of the milk... I just guessed, which I'm assuming could affect the yeast. I also didn't have patience to let the dough rise enough since it took longer than I planned. In the end, it tasted really good, but definitely could have been lighter (less dense)!

dsc02346

Look at the chocolate oozing out of it!
dsc02349