Showing posts with label cake. Show all posts

Monday, January 10, 2011

Best Chocolate Cake Recipe ever...

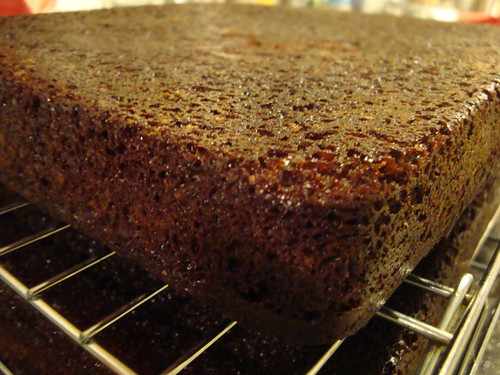
This summer, I was on the search for an amazing chocolate cake recipe. I had made the Hershey chocolate cake recipe several times and while I enjoyed it, I didn't love it. I came across this cake recipe and immediately drooled. The original recipe's buttercream frosting is a bit off on the measurements so I adjusted it and added in some cream cheese to give it a rich flavor.

This cake was divine. I've made it again since and it gets rave reviews. I think this chocolate cake is my go-to recipe from now on.

Chocolate Cake with Vanilla Buttercream Frosting & Chocolate Ganache Glaze
Adapted from Sarah Campbell/ $40 a Day

3 cups packed brown sugar
3/4 cup canola oil
3 eggs
2 2/3 cups flour
2 1/4 teaspoons baking powder
2 1/4 teaspoons baking soda
1 1/2 teaspoons salt
1 tablespoon vanilla extract
1 1/2 cups milk
1 1/2 cups water
1 1/8 cups cocoa powder

Frosting:
1 1/2 sticks sweet butter, softened
4 oz cream cheese, softened
3 cups sifted powdered sugar
2 tablespoons vanilla extract
1 pinch salt

Ganache:
1 1/4 cups semisweet chocolate chips
3/4 tablespoon light corn syrup
3/4 cup heavy cream

Directions

To make the cake: Preheat the oven to 350 degrees F. Oil 3 (10-inch) cake pans and line the bottom with parchment paper. Alternately, oil the pans and then flour them. (I use Wilton's Bake Easy spray instead.) Also, I used three 9 inch pans and made cupcakes with the extra batter.

In the bowl of an electric mixer, combine the brown sugar and oil. Turn on the mixer to a low speed and mix in the eggs. Let the sugar, oil, and eggs mix while sifting together the flour, baking powder, soda, and salt in a separate bowl. Set this mixture aside.

In another small bowl, mix the vanilla into the milk and set this aside as well. Bring the water to a boil and pour over the cocoa and whisk it until it is smooth. To the egg mixture, alternately add the flour mixture and the milk mixture beginning and ending with flour. With the mixer off, scrape down the sides of the bowl after each addition. With the mixture at a low speed add the cocoa. Scrape down the sides of the bowl and pour this mixture into the prepared cake pans. Bake the cake for approximately 15 minutes or until tester comes out clean. When cake layers have cooled, remove from pans.

To make the frosting: In an electric mixing bowl place the soft butter and cream cheese and beat it on a low speed while adding powdered sugar. When all the sugar is mixed in, turn off the mixer and scrape down the sides of the bowl. Add in the vanilla and salt and let the mixer beat for 5 to 7 minutes on a medium speed. Fill and frost the cake and refrigerate it for 10 to 20 minutes to set up the frosting.

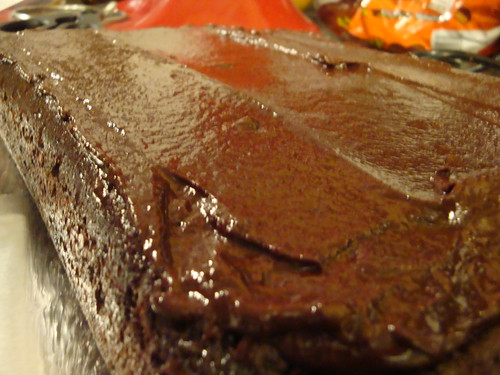
To make the ganache: In a heatproof bowl, place the chocolate chips and the corn syrup. Bring the heavy cream to a full boil. Pour the cream over the chocolate and whisk it until smooth then set it aside.Pour ganache over the top of the cake and, with a cake spatula, smooth the top of the cake and allow ganache to spill over the sides. Refrigerate for 20 minutes or longer.

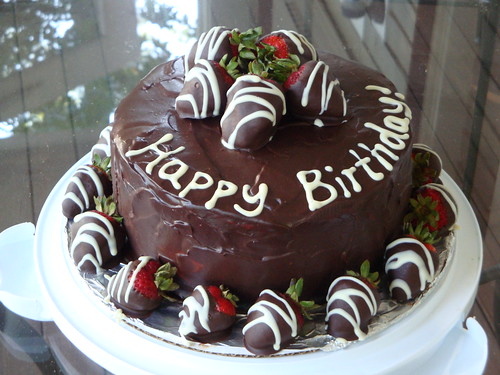
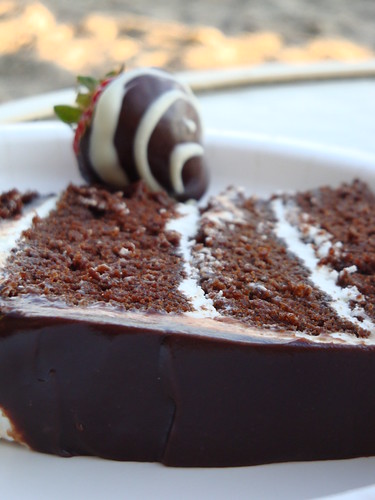
Serve the cake cold or allow it to come to room temperature before serving.  If you so chose, chocolate covered strawberries look great on the cake and taste pretty good as well. Enjoy!
DSC04845

DSC04861

Wednesday, November 17, 2010

Fresh Berry Tiramisu

A few months ago, one of my coworker's announced that she married her long-time boyfriend in a private wedding ceremony. We were very excited for her and wanted to host a small celebration in her honor. I started searching for the perfect recipe to help her celebrate his new beginning and came across a berry tiramisu. I don't think I've ever had tiramisu-- it's not really my thing and halfway through this experiment, I came to the realization it’s really hard to make a recipe that you don’t know what the end product is going to taste like (probably obvious, but I guess I like to state the obvious).

The biggest obstacle for me was creating the sponge cake portion. I had a hard time incorporating the flour mixture into the egg mixture. The flour gobbed up (best description I can think of) and created pockets of flour surrounded by the wet-egg mixture. I was trying to be careful not to deflate the batter by mixing too hard so after a while I ended up baking the cake. The flour chunks softened when I added the syrup after it baked but I realized I need to learn how to fold flour into a wet mixture better. It was stressful!

Anyway, after that adventure, I assembled the cake and I have to say, this recipe is pretty incredible. My coworkers absolutely loved it! I am dreaming of strawberry season so I can make it again.


Fresh Berry Tiramisu
Adapted from King Arthur Flour

Sponge cake

1 cup unbleached all-purpose flour
1 teaspoon baking powder
1/2 teaspoons salt
6 large eggs
1 cup sugar
1/2 teaspoon almond extract

Syrup
Zest of 2 lemons, peeled in strips with a peeler
Juice of 2 lemons (1/3 to 1/2 cup lemon juice)
2 whole cloves
3/4 cup sugar
3/4 cup water
3 tablespoons Grand Marnier or orange juice

Filling
1 pound mascarpone cheese
2 tablespoons orange zest
1 cup (8 ounces) whipping cream
1/2 cup confectioners’ sugar

2 quarts berries: raspberries, blueberries, strawberries or any combination you like
Preheat the oven to 350°F and lightly grease, or line with parchment, a 13 x 18-inch half-sheet pan or two 9-inch square pans (this would lead to a thicker cake).

To make the cake:
Whisk together the flour, baking powder and salt, set aside.

Combine the eggs, sugar and almond extract in a large mixing bowl. Beat with an electric mixer at high speed until thick and lemon-colored, about 5 minutes.

Sprinkle one third of the dry ingredients over the egg mixture, and fold them in with a whisk, taking care not to deflate the batter. Repeat twice more with the remaining dry ingredients, then pour the batter into the prepared pan(s). If you’re using two 9-inch square pans, divide the batter evenly between them.

Bake the cake in the preheated oven for 20 minutes, or until the top springs back when lightly touched with a finger.

Remove the cake from the oven and run a knife around the edge of the pan while still warm (as the cake baked, it pulled away from the edges of the pan, so I didn't need to do this). Place the cake on a rack to cool completely before taking it out of the pan.

To make the syrup:
Combine all the syrup ingredients and bring the mixture to a simmer, stirring occasionally until the sugar dissolves. Once the mixture is clear, remove the syrup from the heat, strain it, and allow it to cool to room temperature.

To make the filling:
Place the mascarpone in a mixing bowl, and wisk in the orange zest. Add the whipping cream a third at a time, stirring between additions until the mixture is smooth. Stir in the confectioner’s sugar. Beat for at least a minute or more as needed until the filling is light and fluffy.

To assemble:
Flip the cooled cake out of its baking pan or pans onto a piece of parchment paper. If you’ve baked on parchment, peel the parchment off the back. Pull the paper straight back, keeping it parallel to the surface of the cake; this will discourage any bits of cake from coming off with the paper.

Slice the cake in half down the middle, to make two roughly 9 by 13-inch rectangles. Trim the rectangles to make 9-inch squares, and set aside the excess to use for another purpose (trifle perhaps?). If you’ve used two 9-inch square pans, flip the cooled cakes out of their pans and peel the parchment off the bottoms.

Place one of the 9-inch squares in the bottom of a lightly greased 9-inch square pan (or a cake stand, plate, etc- basically, you can't really move the sponge cake after you soak it so make sure this is your final destination). Using a pastry brush, generously soak the cake with 1/2 cup of citrus syrup. You’ll need to dab the syrup on, let it soak in for a few minutes, then repeat the process.

After the cake has been soaked, spread half the mascarpone filling over the cake. Next, arrange a single layer of berries over the filling then place the second square of cake on top. Soak this layer of cake with syrup as you did before. Spread the remaining filling over the cake layer, then place the rest of the berries in an attractive design on the top (I started at the perimeter with sliced berries and moved towards the center). Refrigerate the cake for at least an hour before serving.

Yield: one 9-inch cake, 16 2-inch squares.

DSC05046

Monday, November 15, 2010

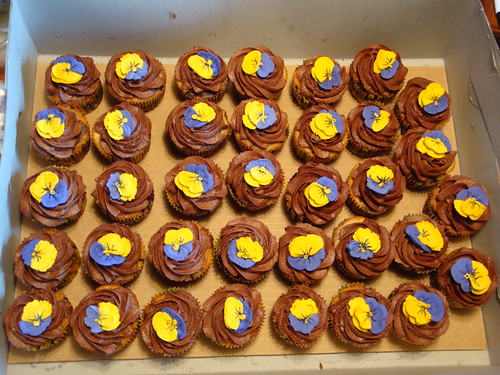
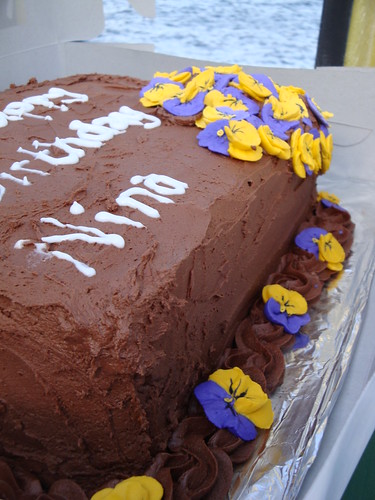
Yummy Chocolate Buttercream Frosting

And I'm back! I really disappeared... I don't know where I went... nor do I know where time has gone. The summer and fall flew by! I baked up a storm this summer and then have cut back this fall... I have a lot of recipes to share that are backlogged from the summer so I apologize if it's not seasonally appropriate since some of the produce is now out of season. Bear with me, I think I found a few great recipes though!

The majority of the summer was focused around my grandmother since we were hosting 90th birthday celebration for her. It was such an honor to celebrate this milestone with our family and friends. We had family that flew in from CA, AZ, FL, NY/ NJ and CO to help celebrate our grandmother's special day.

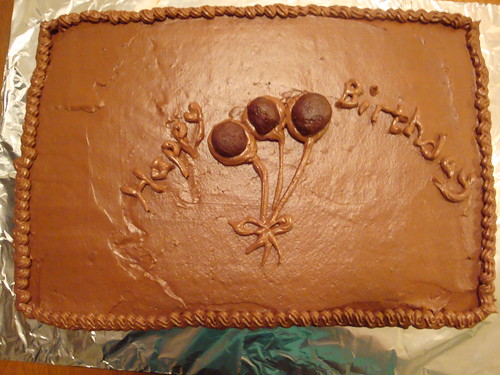
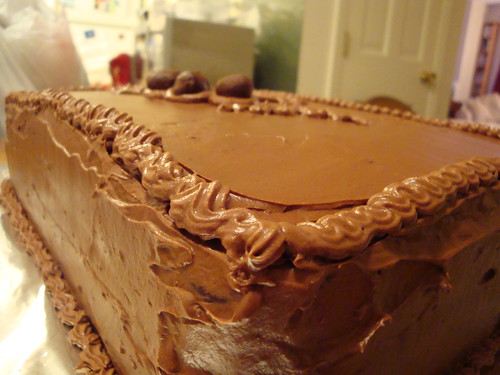
I took the week off from work to spend with our family... and bake and bake and bake. I made a double layer 9x13 birthday cake & 3 dozen cupcakes as well as about 8 dozen cookies for the evening. It was definitely an adventure to make all of the desserts but it was a great learning experience as well. I put my little kitchenaid stand mixer to work. For the cake & cupcakes, I use the marble cake recipe I've used before but tried a new chocolate frosting recipe. I also made about 100 royal icing pansy flowers to decorate the cake. I really liked this frosting-- I think I should have added a bit more milk to some of the batches as it was pretty dry but it came together nicely and worked pretty well for decorating.

I learned a few things in the process:
  • I needed to double each cake layer recipe but couldn't really double it in my mixer, so I had to make 4 batches separately. That is really hard to do with a marble cake mix!
  • The frosting was delicious but I had to make each batch separately as well... which slowed the decorating a lot because I had to stop and make a new batch when I ran out (I think I made 4 batches of frosting).
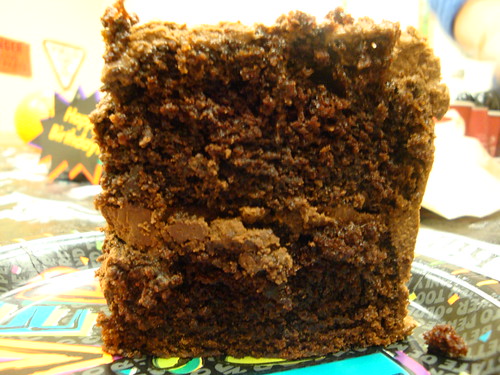
  • I think I made the layers too thick because slicing the cake was nearly impossible. It was stacked a bit too high and fell over. I think I needed to use 1 1/2 batches of the cake recipe vs 2 batches.
Chocolate Frosting
adapted from Williams Sonoma

Ingredients:
8 oz. unsweetened chocolate, chopped
6 cups confectioners' sugar
16 Tbs. (2 sticks) unsalted butter
6 Tbs. milk, plus more, if needed
2 tsp. vanilla extract
1/4 tsp. salt

Directions:
All ingredients should be at room temperature.

Melt chocolate in a double boiler (I use a pyrex bowl over a pot of simmering water) or microwave the chocolate. Stir until the chocolate is melted and smooth. Let cool to room temperature.

In the bowl of an electric mixer fitted with the flat beater, combine the confectioners' sugar, butter, the 6 Tbs. milk, the vanilla and salt and beat on low speed until combined, about 1 minute. Stop the mixer and scrape down the sides of the bowl. Increase the speed to medium and beat for 2 minutes, then reduce the speed to low. Add the chocolate and beat until combined, then increase the speed to medium and beat for 1 minute more.

If the frosting is dry, add more milk, 1 tsp. at a time, until it is creamy but still holds peaks. Makes about 4 1/2 cups.

DSC04680
 
DSC04670
 
DSC04678

Friday, July 9, 2010

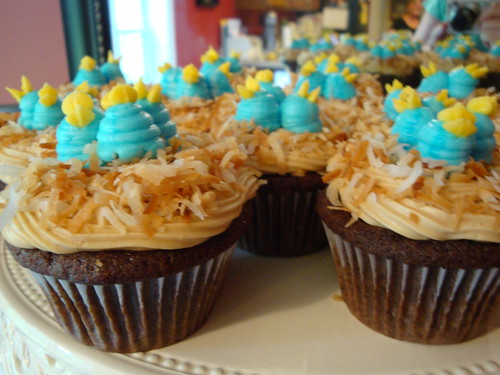
Building a Nest: Samoa Cookie Flavored Bird Nest Cupcakes

I found the idea for these cupcakes on Martha Stewart's site and they worked perfectly for the theme I was going for for the shower. The hardest part came wtih deciding the cupcake/ frosting combination... i needed to pair with coconut and fit in with bird nest concept-- I searched high and low, and had several ideas... but I wasn't set on any of them. At lunch, the last day of work before the shower, one of my coworkers suggested samoa cookie as a flavor idea... and I literally hopped up and ran to google it. I came across this recipe and it just seemed perfect.

It turned out great! The only problem I had was halving the recipe-- it believe I added the whole amount of cocoa for half the recipe-- but it was pretty good! I'd have to make it again to double check that. The frosting is A.M.A.Z.I.N.G.... it was pretty easy to make and tasted perfect. I'm very happy with how these came out... minus the birds. I think they could have been better... plus I forgot to add their eyes! Ooops!


Samoa Bird Nest Cupcakes
adapted from Life in a Peanut Shell (adapted from Ghirardelli Grand Fudge Cake)

Made 24 regular sized cupcakes (I made half the recipe)

Ingredients:
3/4 cup Unsweetened Cocoa (I tried Ghirardelli cocoa for this recipe)
2 cups all-purpose flour
1 3/4 cups sugar
1 teaspoon baking powder
1 teaspoon baking soda
1/2 teaspoon salt
1 cup butter, softened
1 1/3 cups milk
2 large eggs
2 teaspoons vanilla


Preheat oven to 350ºF. Line 2 regular muffin tins with liners.

In a medium bowl, combine flour, cocoa, baking powder, baking soda, and salt, and set aside.

In a large bowl, cream butter and sugar on medium-high speed until light and fluffy, about 4 minutes. Reduce speed to low, and add vanilla and eggs one at a time, scraping bowl after each addition. Alternately add flour mixture and milk (starting and ending with the flour mixture), while mixing on low speed. Continue to mix until smooth. Scoop into muffin tins.

Bake for about 15-18 minutes.


Caramel Buttercream

2 1/2 cups light brown sugar
1/2 cup butter
1 cup heavy whipping cream, (put 2-3 tbsp aside)
1/2 tsp baking soda
3-4 cups powdered sugar, sifted

In a medium, heavy saucepan, bring the sugar and cream to a rolling boil. Boil one minute.

Add soda, and boil one more minute. Remove from heat.

Add butter, but do not stir yet. Let the mixture cool in the fridge for 1-2 hours. Do not stir until mixture is completely cooled.
Pour mixture into a stand mixer and, using the paddle attachment, beat well. Gradually add powdered sugar alternately with 2-3 tbsp of heavy cream. Beat until desire consistency.


To Decorate:

Toast sweetened coconut until golden in color. Let cool.

Using a 1M tip, frost the cupcakes. Then sprinkle coconut on top of the frosting (most around the perimeter). I used buttercream for the birds-- divide into 2 bowls and color blue & yellow (or whatever color you want). Using a round tip, pipe 3 mounds of blue icing in the middle of the cupcakes. Then use a leaf tip and pipe the beak. Melt some chocolate and use a toothpick and dot the eyes on each bird (use your imagination here).


DSC04002DSC03984

Friday, July 2, 2010

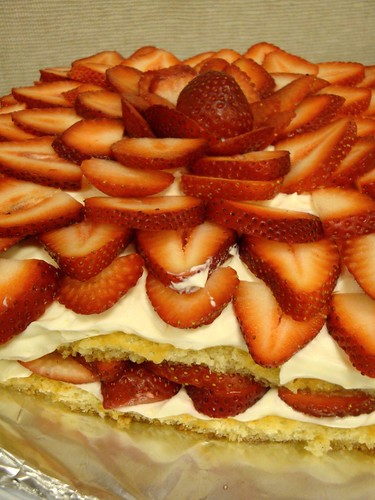
Building a Nest: Strawberry Shortcake Cake

I am skipping to the dessert section of the baby shower-- I think I still have one or two more posts on the appetizers left-- but I wanted to post this recipe before the Fourth of July weekend. I first made this recipe last year for my in-laws 40th wedding anniversary and we all absolutely loved it. I don't believe I had ever had cream cheese frosting prior to that and now I'm hooked. This recipe is absolutely perfect-- I did add some lemon zest to the cake and never measure the powdered sugar that goes into the frosting-- I just judge by taste and texture... and so far, it's worked out pretty well!

If you have a few strawberries laying around the house, I encourage you to try this recipe. It's absolutely devine!

Strawberry Shortcake Cake
adapted from Pioneer Woman

Cake

1-½ cup Flour
3 Tablespoons Corn Starch
½ teaspoons Salt
1 teaspoon Baking Soda
9 Tablespoons Unsalted Butter, Softened
1-½ cup Sugar
3 whole Large Eggs
½ cups Sour Cream, Room Temperature
1 teaspoon Vanilla
2 tsp fresh lemon zest

Icing
½ pounds Cream Cheese, Room Temperature (I use 1/3 less fat cream cheese)
2 sticks Unsalted Butter
1-½ pound Powdered Sugar, Sifted
1 teaspoon Vanilla

1 pound Strawberries
Cake pan at least 2 inches deep-- I used 9 x 2 round pan.

Preparation Instructions

Sift together flour, salt, baking soda, and corn starch.

Cream 9 tablespoons butter with the sugar until light and fluffy. Add eggs one at a time, mixing well each time. Add sour cream and vanilla and mix until combined. Add sifted dry ingredients and mix on low speed until just barely combined.

Pour into greased and floured 9-inch cake pan. Bake at 350 degrees for 45 to 50 minutes, or until no longer jiggly. Remove from cake pan as soon as you pull it out of the oven, and place on a cooling rack and allow it to cool completely.

Stem strawberries and slice them. Place into a bowl and sprinkle with 3 tablespoons sugar. Stir together and let sit for 30 minutes. After 30 minutes, mash the strawberries in two batches. Sprinkle each half with 1 tablespoons sugar and allow to sit for another 30 minutes. The original recipe states to mash the strawberries but I skip that step- I keep them in tact.

Frosting
Combine cream cheese, 2 sticks butter, sifted powdered sugar, vanilla, and dash of salt in a mixing bowl. Mix until very light and fluffy.

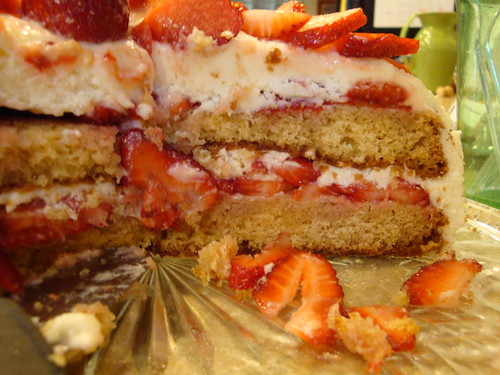
Slice cake in half through the middle. Spread strawberries evenly over each half (cut side up), pouring on all the juices. Place cake halves into the freezer for five minutes- this makes icing the cakes easier.

Remove from freezer. Use a little less than 1/3 of the icing to spread over the top of the strawberries on the bottom layer. Place the second layer on top. Add half of the remaining icing to the top spreading evenly, then spread the remaining 1/3 cup around the sides.

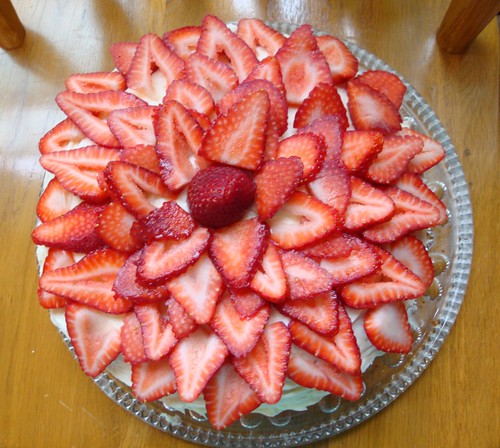
Leave plain OR garnish with strawberry halves. For the decoration below, I sliced strawberries and started at the outside of the cake and layered inwards. It' took a little bit of time but I think it came out nice!

Cake is best when served slightly cool. The butter content in the icing will cause it to soften at room temperature. For best results, store in the fridge! The cake absorbs a lot of the juices from the strawberries -- If serving for a party, it's best to frost a few hours beforehand otherwise the strawberry juices will seep out of the frosting.

DSC03991

DSC03998

Monday, June 7, 2010

Cake Decorating Course 2 Recap

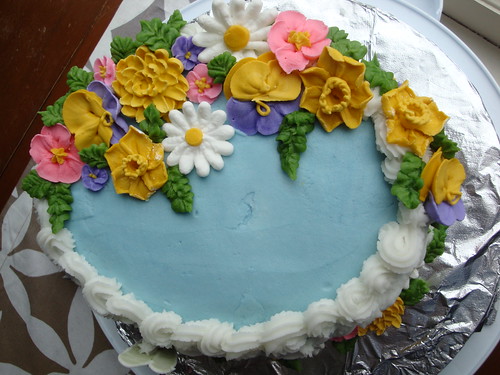
Last week, I completed the Wilton Cake Decorating Course 2! I had an incredible experience learning how to decorate flowers and how to make few new borders as well as the basketweave and crosshatch techniques.

The first class of course 2 was an absolute disaster... it was a good thing I had a sense of humor because from start to finish, it was just ridiculous. We were required to make a 2 layer cake, fill it (with either frosting or a filling) and frost it before class using oval pans that came in the course 2 kit.

I baked the cake, rather uneventfully and made a delicious lemon filling. I fill the cake and attempt to frost it. The crumb coating was just painful-- the frosting kept taking the crust of the cake off. I finally gave up and decided to bring it in to class early so my instructor could fix it.

I pack up my things, put the cake in the carrier and carry it to the car. Even before I get to the car, the top layer goes flying off the cake and smushes against the side of the carrier. At class, my instructor ends up scraping the lemon filling out and throwing frosting on the cake. She was able to get enough frosting on the cake to save it... but neither cake nor frosting wanted to cooperate.

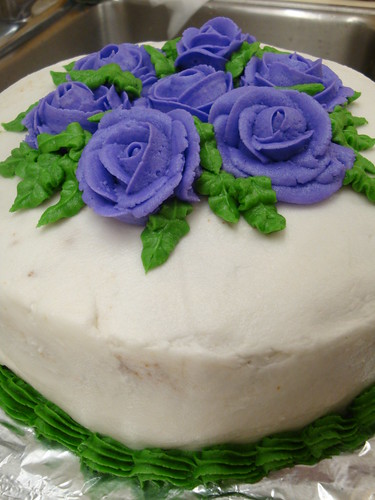
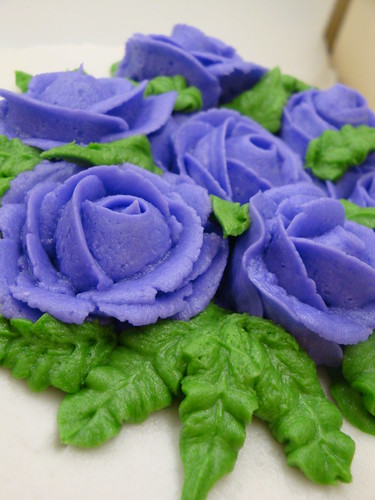
We  learned how to make another type of rose and I was having difficulty with that as well... turns out my tip was welded shut and needed to be pried open. After the tip was opened up, it made things so much better! These were the end result of the roses.

DSC03546

Then, we learned how to cross-hatch, and that went ok... and then came the rope border.... and that was not ok. I was 90% of the way around the top of the cake when half the border decided to fall, and take half the side of the cake with it. I was able to fix it... it was all just too comical at this point. At the end of class, I loaded the cake into the car and go to drive away. I look over at it and realize that the top layer has again slid off the bottom and smashed into the side of the carrier. This cake was just not meant to be... Lucky Danimal was able to enjoy this cake without even having to slice it... I handed him the carrier and the fork and let him dig in!

Final product prior to being demolished:
DSC03552

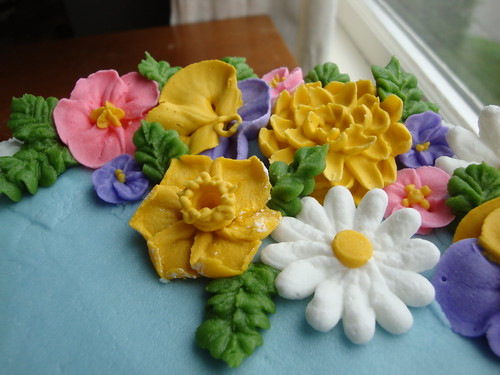
The rest of the classes were uneventful. I finally caved and bought the Wilton Bake Easy Cake Release spray... it really helps to form a nice, even crust on the cake and reduces the crumbs. I didn't believe it until I tried it! We learned how to make daisies, pansies, daffodils, apple blossoms, violets, mums and primroses.

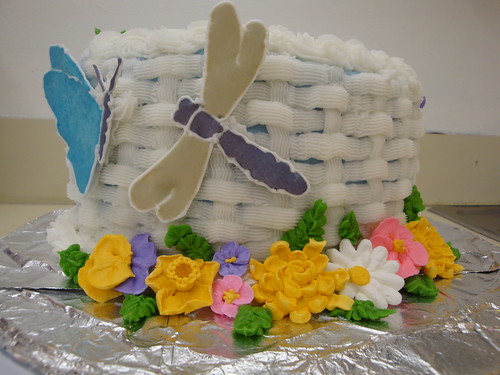
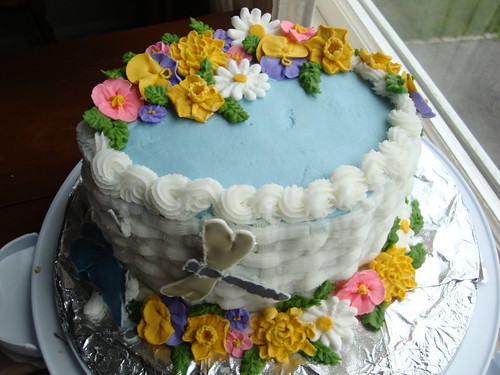
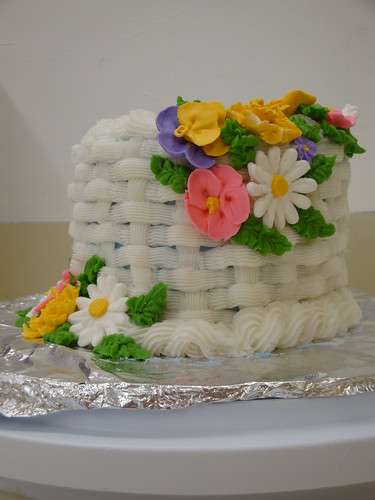
The last class we learned how to make the basketweave stitch. I find that one kind of fascinating! It took me forever to complete but I had fun (and an aching hand by the end). Course 3 starts this Thursday... I'm taking on gum paste and fondant! I can't wait!

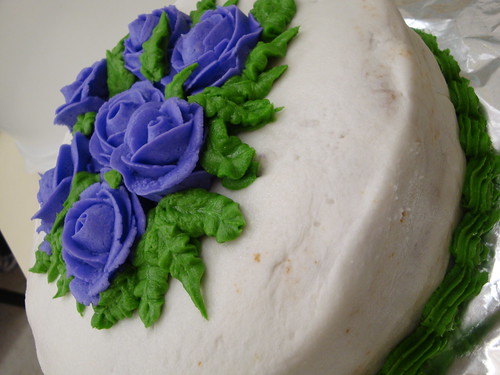
Here is my final cake:

DSC03821

DSC03851

DSC03847

DSC03848

DSC03826

Friday, April 23, 2010

Wilton Roses

Well the roses class was an adventure. I made the cake on Wednesday night after I made dinner (which took a lot longer than I expected). I couldn't find the shortening so I couldn't make the frosting nor frost the cake ahead of time. I ran home from work Thursday afternoon and whipped up the frosting and did the crumb coat and final layer... there are still a ton of crumbs sneaking through and I really need to practice. I also realized on the way home that my cake carrier was broken (and I left it at work) so I ran into KMart and grabbed one.

Turns out the cake carrier was too small and didn't fit the cake.... so I placed the cake gently in my car and drove to class. Just as I was pulling in to Michaels, the sky opened up and it started pouring rain! I had to make a dash from the car to the store without getting too much rain in the frosting. I ended up purchasing a new cake carrier (and a few new icing colors) and having a great class. Because of the humidity, the frosting softened up really quickly and was rather tough to work with but I think I got the hang of the roses and can't wait to practice!

I can't wait for course 2 in May!

DSC03333

DSC03331

DSC03334

Wednesday, April 21, 2010

Cake Decorating Course 1 recap

This week is Danimal's first full week home since January. I haven't occupied my kitchen much in the last few months so I'm running low on posting material. I'm hoping to have more to post in the next few weeks and I'll be posting more often again.

During the month of March, my friend and I took the Wilton Cake Decorating Course 1 at Michaels. It was graet to learn some of the basics. I didn't love the projects they had us do but it was really fun anyway.

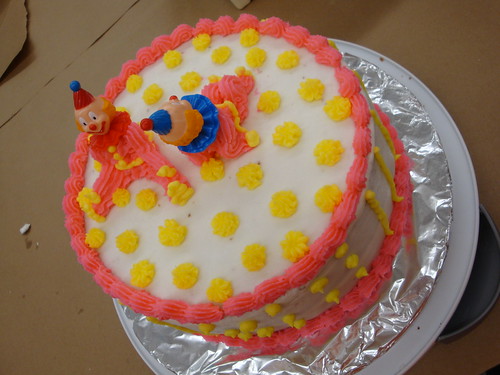
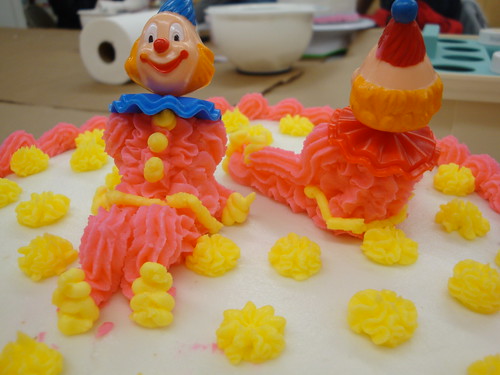
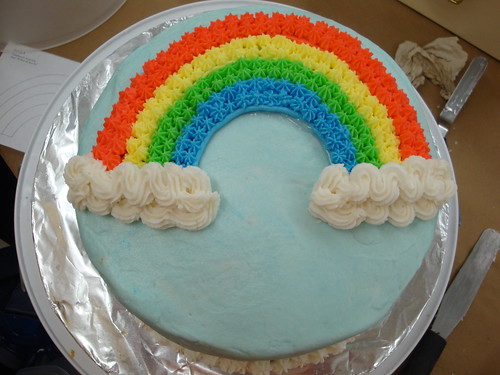
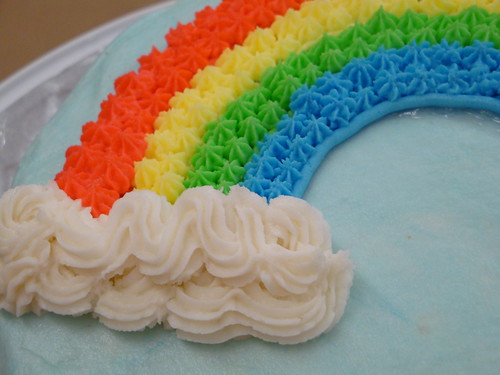
I am making up the roses class this week so I'll post pictures from that but in the meantime, here are pictures from class 2 (clowns) and class 4 (rainbow). We're taking course 2 in May. Starting in June, Wilton is reorganizing their courses so I'm intrigued to see what the changes are.

For the first cake, I used Smitten Kitchen's yellow cake recipe and filled it with a raspberry puree of sorts. It tasted great but was not great pared with the Wilton buttercream frosting we have to use. I am not a fan of the frosting recipe because it's just too sweet for me and can't wait to play around with different recipes. For class 4's cake, I ended up using a box mix. Since I really don't like the frosting, I didn't really want to waste my time or good ingredients. I filled it with a peanut butter concoction. Interesting choice-- I wasn't a fan but some of my coworkers enjoyed it.

Course 1; Class 2
Creepy clowns, huh?! They are weird!  
 DSC02947

 DSC02945

Course 1; Class 4
DSC03087

DSC03091

Thursday, November 19, 2009

Channeling My Nana Ruby

My Nana Ruby is the person I picture when I am baking. She was an incredible baker, who made all our birthday cakes, bat/ bar mitzvah cakes and my parents wedding cake. She also had a killer apple pie! I remember sitting on a stool as a young kid and peeling apples... but I had to peel it in one piece and leave as much meat on the apple as possible. Nana Rubs also had this amazing chocolate cake that was our favorite. She called it Mississippi Mud Cake. Unfortunately Nana Ruby never wrote her recipes down and it was too late by the time we thought to ask her for it. I've been on a mission to replicate her Mississippi Mud Cake for a while... when I look for recipes called "Mississippi Mud Cake" it is definitely not what she made. We think she may have used part of the Hershey recipe so here I am...

Two of my coworkers are celebrating their 60th birthdays this year and my department is throwing a surprise party for them on Friday. I offered to make the cake. My goal for the winter is to take a cake decorating class so I can learn proper decorating techniques. All and all I think it turned out well. I'll update with pictures of a cake slice once we cut into it :)

Hershey's "Perfectly Chocolate" Chocolate Cake
http://www.hersheys.com/

2 cups sugar
1-3/4 cups all-purpose flour
3/4 cup HERSHEY'S Cocoa
1-1/2 teaspoons baking powder
1-1/2 teaspoons baking soda
1 teaspoon salt
2 eggs
1 cup milk
1/2 cup vegetable oil
2 teaspoons vanilla extract
1 cup boiling water

Directions:
Heat oven to 350°F. Grease and flour two 9-inch round baking pans.

Stir together sugar, flour, cocoa, baking powder, baking soda and salt in large bowl. Add eggs, milk, oil and vanilla; beat on medium speed of mixer 2 minutes. Stir in boiling water (batter will be thin). Pour batter into prepared pans.

Bake 30 to 35 minutes or until wooden pick inserted in center comes out clean. Cool 10 minutes; remove from pans to wire racks. Cool completely.

dsc02112


Chocolate Ganache Fillling
3 oz unsweetened chocolate, chopped
4 oz bittersweet chocolate, chopped
2 oz semi-sweet chocolate, chopped
1 cup heavy cream
1 1/2 tbsp butter

Chop chocolate and place in a bowl. Heat cream & butter on the stove. When cream boils, pour over chocolate and mix. I used a mixer to whip it for a bit as well.

Cake with a thick layer of whipped chocolate ganache
dsc02116

Chocolate Buttercream Frosting
http://www.hersheys.com/

6 tablespoons butter or margarine, softened
2-2/3 cups powdered sugar
1/2 cup HERSHEY'S Cocoa or HERSHEY'S SPECIAL DARK Cocoa
1/3 cup milk
1 teaspoon vanilla extract
Beat butter in medium bowl. Add powdered sugar and cocoa alternately with milk; beat to spreading consistency (additional milk may be needed). Stir in vanilla. About 2 cups frosting.

Here is my pathetic attempt at cake decorating! Hopefully this doesn't get submitted to CakeWrecks- such a horrible job decorating... it was past 11pm at this point and I was a little delirious & hopped up on frosting!
dsc02122
 
dsc02124
 
This is the best picture I was able to take at the birthday celebration...
dsc02148

Wednesday, November 4, 2009

Mmmmm Raspberries!

Raspberries are awesome. Last night I made Raspberry Buttermilk Cake  for a pick-me-up for my coworkers. I love this recipe- it's so quick & easy! I've tried it with strawberries too and you can definitely use any berry to make this scrumptious cake.

Raspberry Buttermilk Cake
http://smittenkitchen.com/ adapted from Gourmet, June 2009

1 cup all-purpose flour
1/2 teaspoon baking powder
1/2 teaspoon baking soda
1/4 teaspoon salt
1/2 stick unsalted butter, softened
2/3 cup plus 1 1/2 tablespoons sugar, divided
1/2 teaspoon pure vanilla extract
1/2 teaspoon finely grated lemon zest (optional)
1 large egg
1/2 cup well-shaken buttermilk
1 cup fresh raspberries (about 5 oz)

Preheat oven to 400°F with rack in middle. Butter and flour a 9-inch round cake pan.

Whisk together flour, baking powder, baking soda, and salt and set aside. In a larger bowl, beat butter and 2/3 cup sugar with an electric mixer at medium-high speed until pale and fluffy, about two minutes, then beat in vanilla and zest, if using. Add egg and beat well.

At low speed, mix in flour mixture in three batches, alternating with buttermilk, beginning and ending with flour, and mixing until just combined.Spoon batter into cake pan, smoothing top. Scatter raspberries evenly over top and sprinkle with remaining 1 1/2 tablespoons sugar.

Bake until cake is golden and a wooden pick inserted into center comes out clean, 20 to 25 minutes. Cool in pan 10 minutes, then turn out onto a rack and cool to warm, 10 to 15 minutes more. Invert onto a plate.

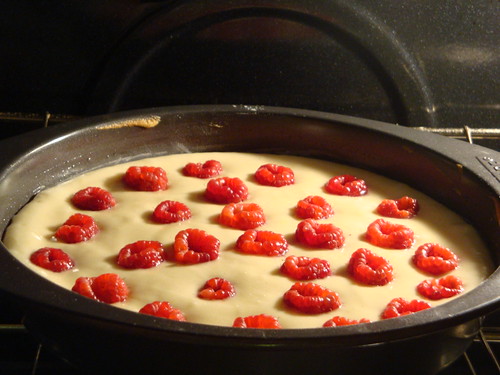
I place my raspberries in the batter so the hollow centers are exposed and place them in a circle from the outside towards the center.

dsc01842

dsc01881